CREDITS:
shadowraith
and me. xD
I hope someone finds this useful, so let's get started:
1. Open up a new image, I used 400x150, make sure that the layer will be Transparent. Create a new layer, call it 'Main Shape'. Go to the Paths section in the "Layers, Channels and Paths" dialogue and click New Path. Get out the Pen tool and make a selection, mine is shown below. Once you are done, go back to the Paths dialogue, right click your new path and select "Make Selection". This is what mine looks like so far:

2. Now go Select>Save Selection and call it "Main Shape Selection".
You have selected your Main Shape layer so now you are going to colour your shape by using the gradient tool. Choose two similar colours as your FG and your BG colours that suit your future render best. In the gradient tool option, choose a Bi-linear shape. Hint: when you go to fill the shape, start from the middle and go to the top in a straight line. This is what I chose:

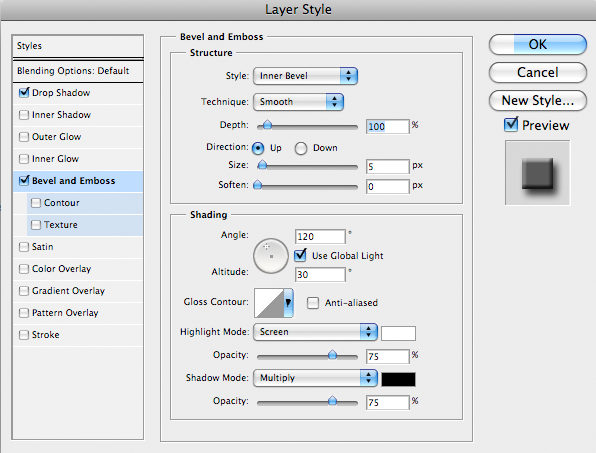
3. With the Main Shape still selected go Layer>Layer Style>Drop Shadow at these settings:

The go Layer>Layer Style>Bevel and Emboss with these settings.
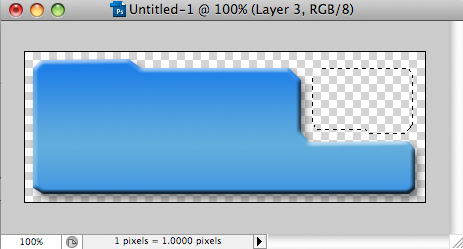
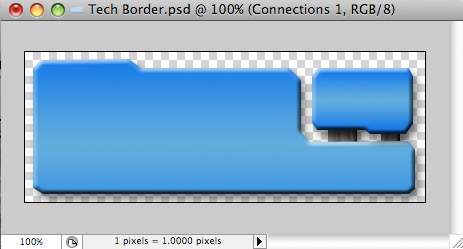
4. Create a new layer and call it 'Secondary Shape'. Create a new shape using the same method used in step 1 in the open space. Here's mine:
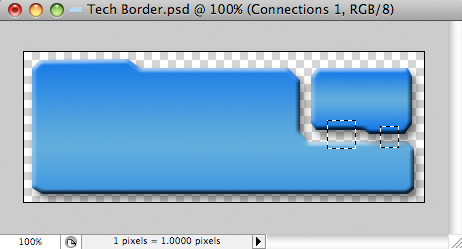
5. When you still have selected the Secondary Shape, save it as well and call it Secondary Shape Selection. After that, repeat the gradient, drop shadow, and the bevel to this selection. Once that is done, create a new layer and call it Connections 1 and put that layer under all of the other layers, except for the Background. Make one or two rectangle(s) by using the Rectangular Marquee tool and hold shift down while making them. This is how mine looks like:
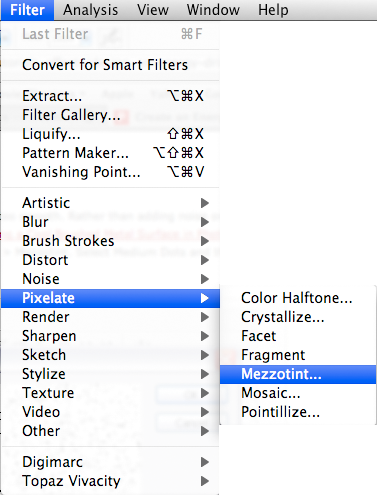
6.Repeat the gradient, drop shadow, and add bevel to this selection. But for the gradient, use black to the Foreground and white to the Background. Then create a new layer and fill the area of the Connections with white.Then go to Filter > Pixelate > Mezzotint. Select Medium Dots and then apply the filter. Next go Filter>Blur>Radial Blur. Select Best Quality and 100 Amount. Then set the layer's Blending Mode to Color Burn. Here is what mine looks like so far:


7. This step will be adding the real interesting parts of the signature. First select none, then go select the Main Shape Selection (Select>Load Selection and choose 'Main Shape'), and go to Select>Modify>Contract, by 6 pixels. This is another important selection, so make a channel to this one too, and call it Grunge.
Create layers for the grunging, and call them Grunge 1,2,3
.
Now in this selection, do your normal grunging. I mixed a bit grunging with some tech brushes, but you can also wait with the tech brushes for later, like I did.
Make sure you dont leave this selection, and also make sure for the first Grunge layer, get out the Paint Bucket tool and fill the whole selection with either black or white or it will cause troubles later.
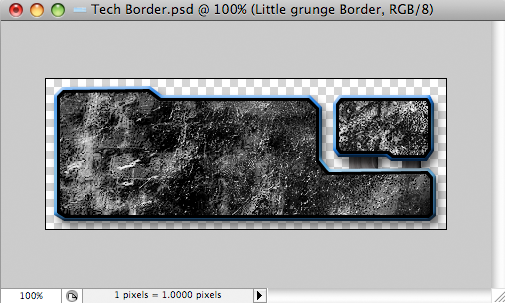
Now we need to add a border to the grunge section, so back and create a new layer just above the Grunge 1 layer and call it Grunge Border. Go to Select>Modify>Expand, and choose 3pixels. Fill it with whatever color suits you best, I chose black. This is mine:

8. Create a new layer at the top of the layer pile and call it Little Background. Its time to fill the second shape. Select none and make your Secondary Shape Selection and shrink it by 6pixels, also save this one and call it Little Background Selection, then again, start with fill it and make some grunge. After that, make a new layer and call it Second Shape Border. Select your Little Background layer and go to Select >Modify>Expand, and do 3pixels. I filled it again with black. This is how it looks like now:
9. For the last steps, its time to add the render, first to the big area. Merge all your Grunge 2+ layers into one, by all of the layers and going Layer>Merge Layers. After that, Load Select the 'Grunge 1' layer. Now add some extra colors that match your render, creating a Color Balance adjustment layer and change it as you like, also now its time to add some tech brushes. This is how mine looks like:
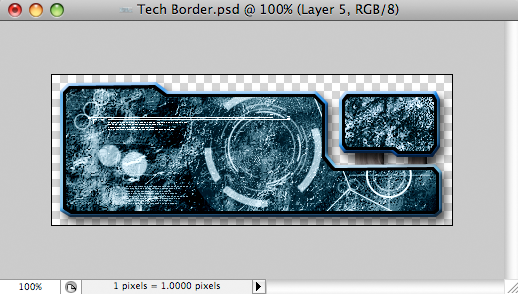
10. To make the lighting on the background a little more interesting, create a new layer at the top of the layer pile, go Image>Apply Image, then Filter>Other>High Pass at 10. Set to Soft Light at 50% opacity.
Now create a new layer and call it Render 1, and put it on top of all other layer and go to your 'Grunge 1' layer and Load Select it, then select the 'Render 1' layer by clicking on the layer and Paste Into with your render. Now you can also add some new tech brushes, on the purpose there should be some on the render. Like this:
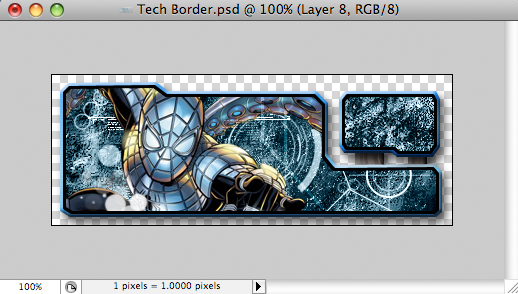
11. Now finally to the little background. Select none, and create a new layer and call it Render 2. Go to your 'Little Grunge 1' layer and Load select it. Select Render 2 and make a grunge background, paste in another picture or whatever you like.

13. Last you only need to add some cool text and youre done!